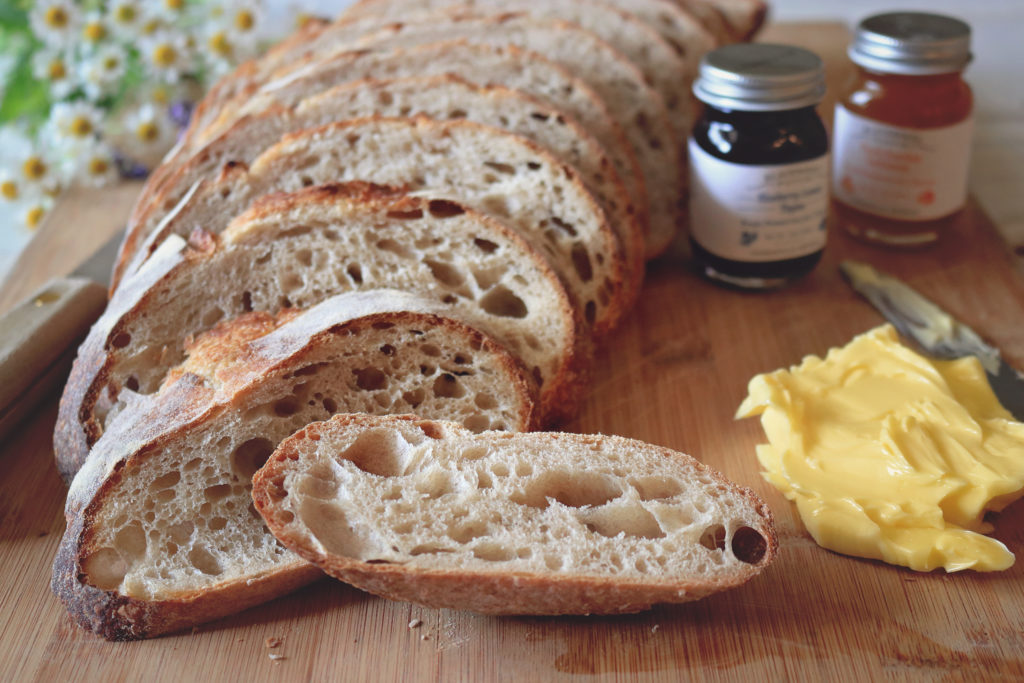
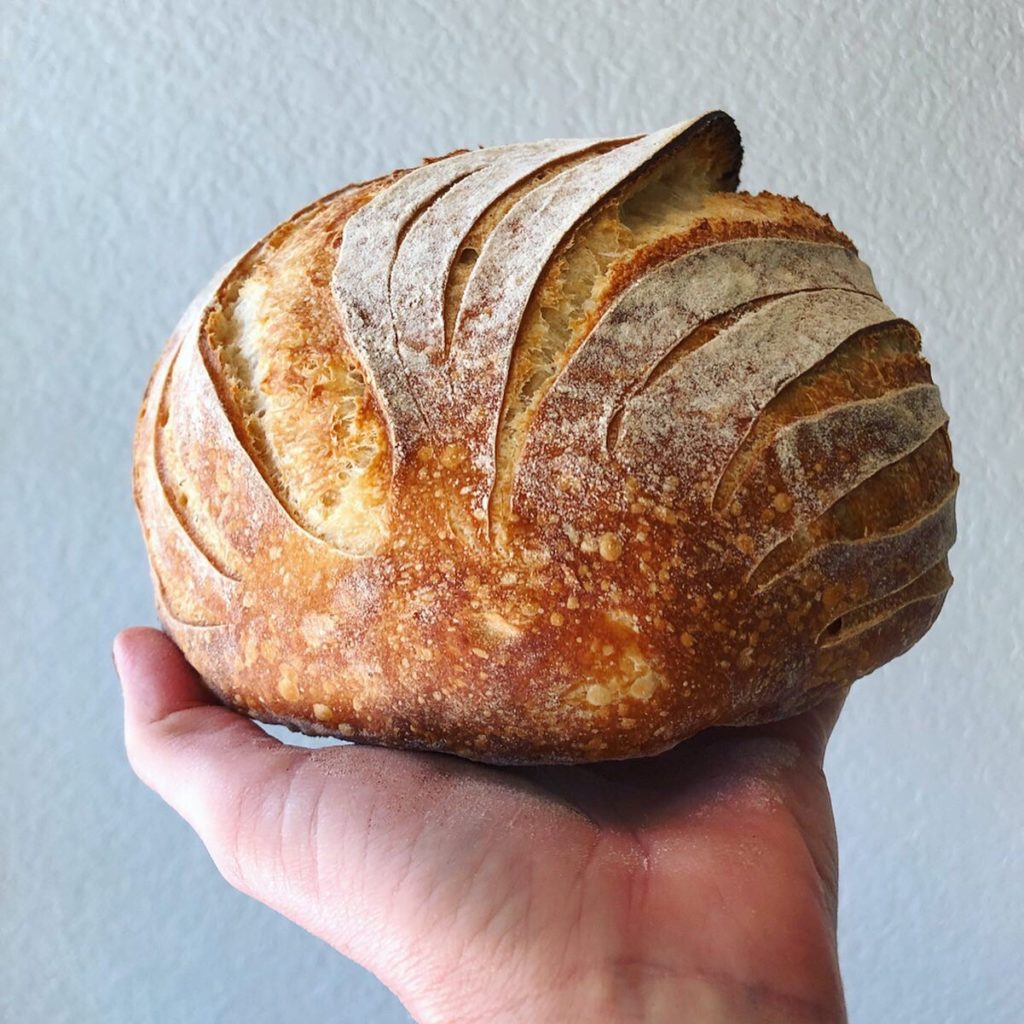
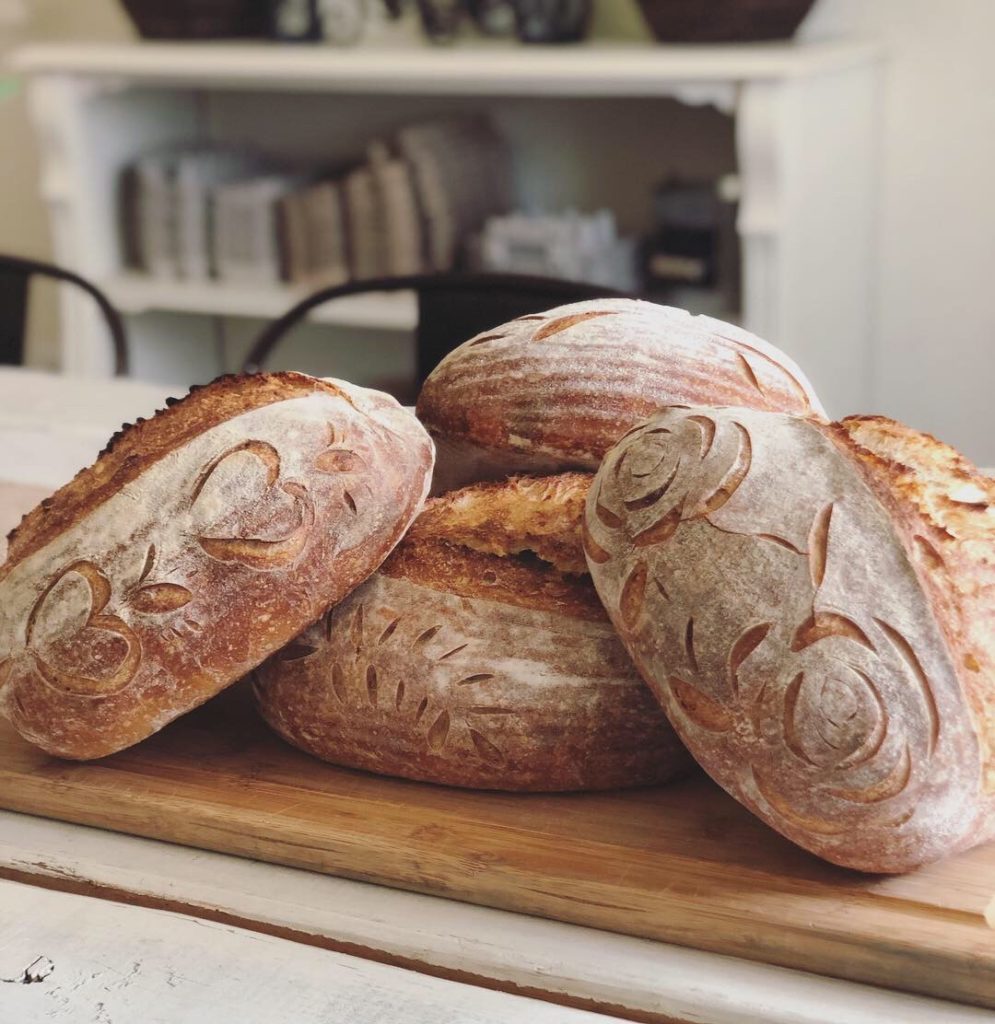
This Sourdough bread recipe uses our Wild Yeast Sourdough Starter recipe, or you can purchase our ready made wet starter, but you can use any starter that is at 100% hydration (equal parts water to flour). I call this the Best Sourdough recipe because it so versatile, forgiving, easy for beginners yet looks professional, delicious complex flavor, mild tang, perfect crispy chewy crust, and a moist tender open crumb. And the best part about it? There is absolutely NO kneading involved. This wet, sticky dough is folded (using a letter fold technique) instead of kneading in order to keep flour addition to a minimum. The stretching and folding helps to form strong gluten strands that trap the gasses, resulting in the perfect holy open crumb – exactly what you would expect good sourdough to have. I also love this recipe because it makes TWO large loaves. One to eat now and one to pop into the freezer for another day (just defrost completely before slicing).
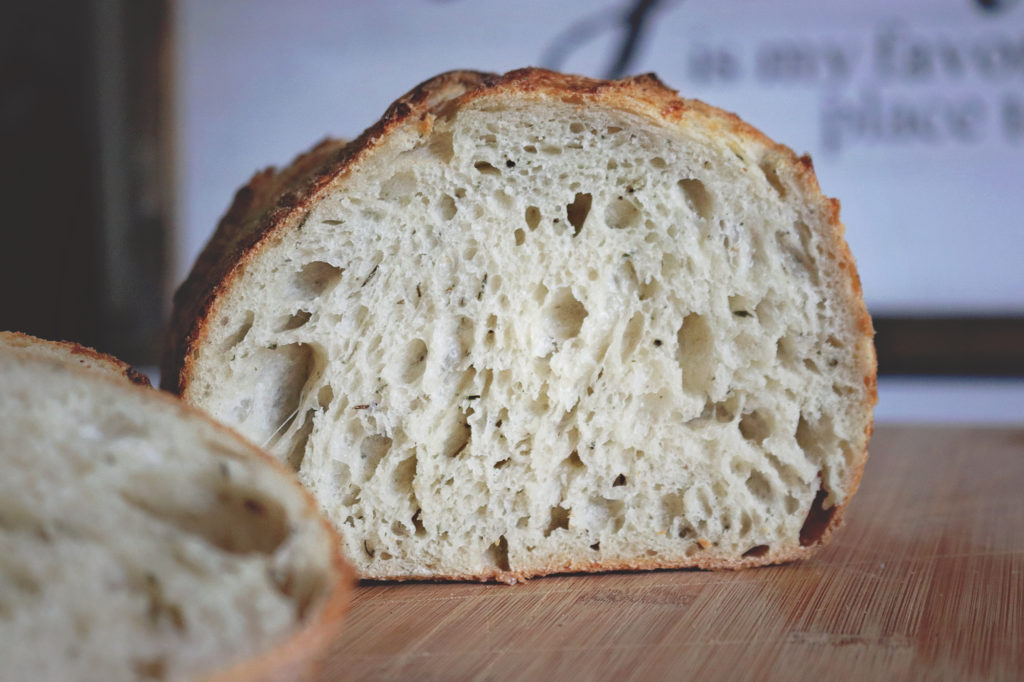
Soft open crumb of an ‘Herbs de Provence’ loaf
Below is the basic base recipe – but once you get comfortable and efficient with your Sourdough, you can start to experiment with adding various flours to make it multi-grain or complimenting your loaves with different flavors such as cranberry cinnamon walnut, herbs de provence (a favorite in my house), lemon white chocolate, garlic and feta, and so on…
Yield: (2) two pound loaves (approx 915 g each baked)
Desired Dough Temperature during fermentation: 78 degrees
Timing: For 12 hr fridge proof and to bake the loaves around 9:30 A.M. – Start your dough between 4 and 5 P.M. on the day before you intend to bake. If you’re making multiple batches, or it’s cooler in your house, or you just want to extend the fermentation for deeper flavor and more open crumb – start your dough earlier in the day. I usually make 3 batches (6 loaves) and I start around 2-2:30 pm. Adjust your starter feed times accordingly to make sure your starter is at its peak when you begin your dough.

what you will need to make this bread
- High quality all-purpose flour, bread flour, rye flour (can also be made with all bread flour, all all-purpose flour, or any combination of the two – just use what you have. It won’t make much difference in the final product)
- Semolina or Brown Rice Flour (optional – for dusting the loaves before scoring)
- Bench scraper (optional, but handy)
- Bread peel (optional)
- Kitchen scale
- Stand mixer
- 2.5 gallon rectangular plastic food storage container with lid (Find on Amazon)
- 2 Bannetons/Brotforms or bread proofing baskets (Find on Amazon)
- Razor blade, or lame for scoring (Find on Amazon)
- Large baking stone (Find on Amazon)
Ingredients
- 360-363g ripe sourdough starter at 100% hydration
- 604g water @ room temperature
- 1018-1020g total flour (I use a combination of about 10% rye, or whole grain wheat, 40% bread flour or strong 00 type flour, 50% organic all-purpose flour. You can also use ALL all-purpose flour for a very light, creamy loaf. It will be airy and delicious, it just won’t have as much nutrition)
- 26g sea salt or kosher salt
- olive oil or avocado oil (for the folding containers) optional
Dough Directions
- In the bowl of a stand mixer, weigh out the starter and then add the water. Stir the starter and the water together briefly to form a slurry and dissolve the starter into the water
- Add the various flours you intend to use for a total weight of about 1020 g flour
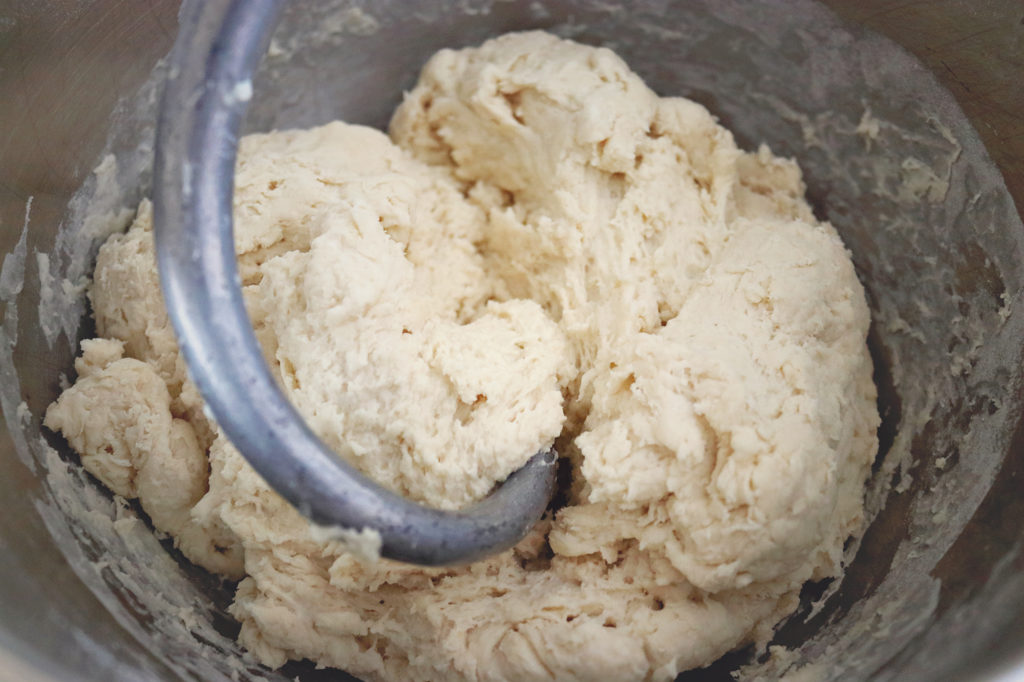
- Using the dough hook, mix together on low/med speed until combined and just pulled away from the side of the bowl (about 1-2 minutes). The dough will look shaggy
- Cover the bowl with a tea towel and let fermentolyse (rest) for 30-45 minutes. (if you’ve started late in the day or are in a rush – go 30. If you have the time to spread out the fermentolyse to 45 min, go for it!)
- After the fermentolyse, add the salt to the dough and mix on medium speed for about 3-4 minutes until it looks nice and smooth (medium level gluten development)
- Coat the bottom of your large plastic container with a small amount of oil (I use olive oil or avocado oil) so the dough doesn’t stick during bulk fermentation
- Transfer your dough to the lightly oiled container and fold the sides over from the bottom up to form a very rough ball shape. Flip the dough ball over and place the cover over the container loosely
- Ferment for 2.5 to 3.5 hours or in a warm spot (I use the proof setting in my oven during the colder months)
- Perform complete folds on the dough at 50, 100, and 150 minutes (*see note below) then leave the dough to finish bulking until very jiggly and puffy (approx 50% rise)
- Turn the dough out onto a clean counter and divide into two equal pieces. Pre-shape each piece into a ball or boule, gently working out any large gas bubbles as you shape
- Let the boules bench rest, covered with a tea towel, for 15 minutes
- Shape each piece into your final shape: batard (oval), boule (round), baton/baguette (long)
- Place your loaves, seam side up, into bannetons (linen-lined, tea towel lined, or unlined for pretty lines on final loaves)
- Slip the bannetons into plastic bags (grocery store plastic bags work perfectly) and tie at the ends
- Proof your loaves at room temperature for 1 hour
- Place the loaves, still in the plastic bags, into the refrigerator for 12-14 hours or overnight
Pre-autolyse, after mixing
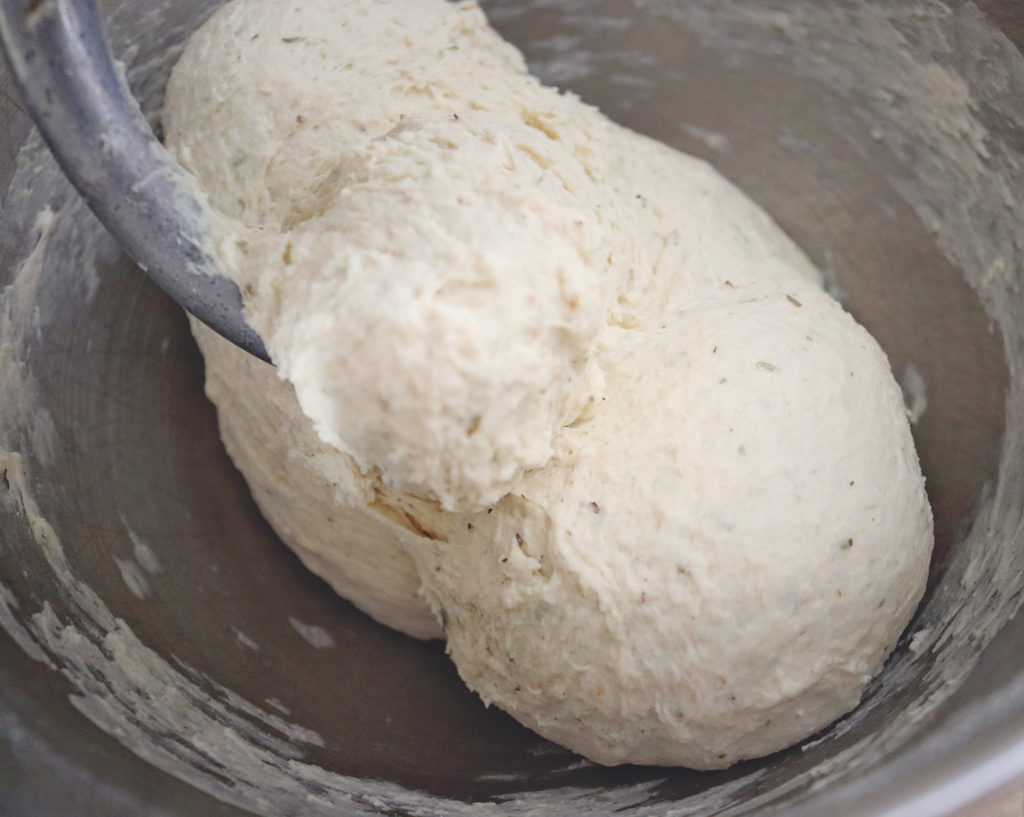
Post-autolyse, with salt and herbs added (for Herbs De Provence loaves)
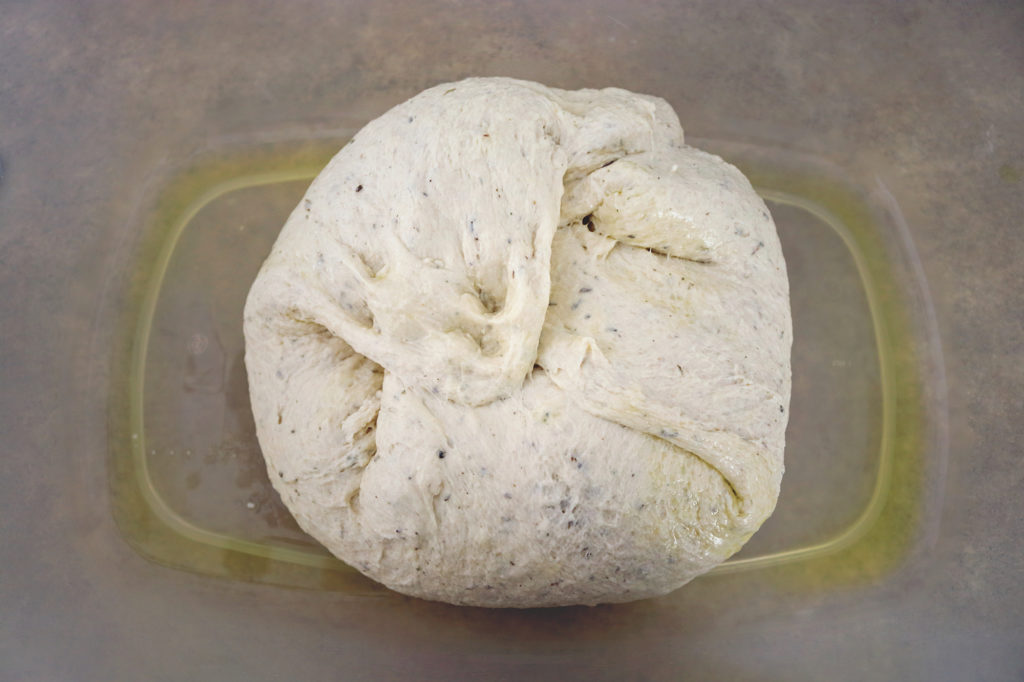
Herbs de Provence dough – post autolyse, pre ferment – in oiled folding container
*how to fold the dough
Envelope tri-fold: Without removing the dough from the oiled container, take one side of the dough in both hands and pull (stretch) the dough up as high as it will go without ripping it and then fold it back over into the middle of the dough. Rotate the dough and repeat on the other side to form a rectangle “envelope” style fold. Turn the dough a quarter turn and perform the stretch and fold one more time. Finally, turn the whole “rectangle” of dough over onto the other side (so that it will be folded the opposite direction the next time. This is considered one complete fold. Perform this technique at 50 minutes and again at 100 minutes of fermentation. You will notice that with each fold the dough becomes stronger and a little less easy to pull and stretch.
If after the 150 minutes of fermentation, the dough doesn’t seem puffy or strong enough. Go ahead and perform another fold and another 50 min fermentation. If I am not in a rush, I typically always perform 3 complete folds and ferment for 200 min to strengthen the dough further.
Baking Directions
- In the morning, about an hour before baking time (around 8:30 A.M.), place your baking stone in a cold oven and preheat the oven to 500 degrees.
- Also preheat a shallow pan underneath the rack with the stone or on the very bottom rack of your oven (or use the steam bake setting on your oven, or lava rocks – whatever you intend to use for steam to develop the crust in the first 15 min of baking)
- When it’s time to bake (9:30 A.M.) place a piece of parchment paper that will fit the size of your loaf and the size of your baking stone onto a bread peel (or the underside of a cookie sheet if you don’t have a bread peel) and remove one of the loaves from the refrigerator
- When the oven is pre-heated, pour about a cup of very hot water onto the preheated pan on the bottom of your oven – to create steam.
- Turn the cold proofed dough out of the banneton and directly onto the parchment paper
- Sprinkle the loaf with any gluten free flour (I use brown rice flour) and smooth over the top (optional, but makes scoring easier)
- Using a lame or razor blade, score the loaf by making two overlapping cuts that are almost parallel to the long axis of the loaf, or one long smooth cut, or three diagonal cuts (see video below)
- Slide the loaf still on the parchment paper off your bread peel onto the hot pizza stone and immediately place a few ice cubes next to the loaf on the stone. close the oven door quickly to not lose too much of that precious heat
- Turn the oven down to 475 degrees and set a timer for 15 minutes
- Rotate the loaf and turn the oven down to 450 degrees and bake another 14-15 minutes, rotating the loaf half way through baking during this time
- Allow to cool completely before slicing
- Note: if your baking stone is large enough, you can bake two loaves at a time using the same methods above!
https://www.instagram.com/p/CEXH5a7HGCk/
https://www.instagram.com/p/B3H0PeznLfv/

Just reading this makes me feel accomplished! Such an impressive skill—beautiful bread! Maybe someday I will get everything together and try this. When I’m ready I will certainly be following your excellent instructions! Thank you for sharing!
Hi – I have a question. I have a starter already but i would like to try yours. Can I combine them? And if I can combine them to make one starter can i use it to make the sourdough bread you have on this website??? Ty
Yes, you can combine them. Just make sure your final starter mix is 100% hydration and doubles itself in about 8 hours.
Greetings…thank you for sharing this recipe…can’t wait to give it a try! can you tell me if there would be any temperature change if using baking steels versus baking stones?
donna
donna.thorne@gmail.com
You will have to experiment with a loaf, making sure it doesn’t brown too much on the bottom, but I would say give it a go at the same temperature.
I Erin, I would love your starter recipe please.
Hi Rebecca – the starter recipe is linked in the post 🙂
I have an older version of your recipe printed out that uses a Dutch oven for steam. I am curious to know why you switched the recipe to use water or ice for steam instead?
Thanks
The change is so you can bake more than one loaf at a time. I often have upwards of 12 loaves to bake in a morning, and being able to bake 2 at once saves me a lot of time. If you only want to bake one loaf at a time, a Dutch oven still works great.
Hi there,
Just wondering what the pan underneath the stone is for? Is this necessary?
Thanks!
Thanks for catching that, the pan is for steam. When the pan is preheated and you add hot water to it right before you insert the loaves, it will create steam that should last for the first 15 minutes of baking in order to develop the crispy, chewy golden brown crust.
Would this recipe work to put in loaf pans and make more of a sandwich style bread? If so would you still use the steam method or just bake in the oven the same as a normal sandwich bread?
If you like crusty sandwich bread use the steam method. If not it should be fine to bake without, although the crust may not darken as much. It may be easier to look for an actual sourdough sandwich bread recipe
I use this same recipe to make sandwich bread every week. The method is the same, but I line my bread pans with parchment paper, cold proof overnight and bake the same way. 15 min with steam, 15 min without. After the final 15, pop the loaf out of the pans and put directly onto the stone for 2 more minutes to crisp the crust.
My first loaf is in the oven now. Unfortunately the act of putting ice on my pizza stone made it snap in two. I wouldnt reccomend doing that if you like your pizza stone.
Pizza stones are designed to cook frozen pizzas, so 2-3 pieces of ice shouldn’t have cracked it. The only thing that has ever caused an oven stone to crack in the 18 years I’ve been baking Sourdough was mistakenly putting the cold stone into a hot oven, as the stone must be put in while the oven is still cold and preheated fully with the oven.
Well i would’ve liked that to be true. By the end of my baking my stone was in 6 pieces. I didnt use any ice with my 2nd loaf. I am making this recipe again today, using the salvaged chunk of pizza stone i have left. I’ll put ice in my pan underneath. One part i havent seen mentioned is when to remove the parchment from the loaf. My first loaf didnt get a crisp bottom woth the parchment still on. Second loaf i removed the parchment after the first 15 minutes. Much better
I leave the loaves on the parchment paper the entire 30 minutes of baking, but you do whatever works best for your situation.
I’m fairly new to bread baking. If you put the dough into the banneton over night in the fridge and take it out to bake the next morning, how do you clean the banneton afterwards if there wasn’t any lining in it?
You will need to coat the banneton with a fair amount of flour first, and then the next day once it dries you can knock most of it out. A better bet would be to line the banneton with a tea towel instead, that way you’re not dealing with additional flour and the bannetons always stay clean.
Does the dough has to rise in the fridge? My first 4 loaves (2 by 2) rose, while they were placed in the fridge. My last 2 doughs don’t rise an inch. And now someone tells me that they shouldn’t while in the fridge.
The dough should rise only slightly in the fridge. Most of the rising happens in the first hour that the dough is left out at room temperature. The 12-14 hr cold proof (or cold retard) is meant to slow down the rising process while increasing flavor and tang. If you notice your dough rising significantly during the cold proof, check the temperature of your refrigerator and make sure it is on the coldest setting possible. If your fridge isn’t cold enough, your dough may become over proofed.
I used the best bread loaf recipe.
I also do not recommend putting ice on the hot baking stone. My stone cracked after putting a few ice cubes n the stone. Fortunately my daughter does not use hers and will give it to me. The bread did turn out good though.
The ice cubes are definitely NOT required. All the ice cubes do is create quick steam close to the bread rather than on the bottom of the oven. You can get great results without using the ice cubes at all. Hope that helps!
I baked my two loves one at a time and they both came out vert lopsided. Like the top part is leaned way to the left. Any idea what happened?
Pat
Loaves that bake up lopsided or “wonky” are due to either under-fermenting the loaves or poor shaping during your final shape. The final shape of the loaf can also be determined by the way you score the loaf. Try fermenting until the dough is light and puffy and airy. Next, try and shape the loaf as evenly as possibly and finally, make sure to score with your lame or blade at a slight angle (about 45 degrees to the dough)
Question: If often get to 8 or 9 pm and have the 2nd and 3rd turning to do before separating the loaves, so I stay up too late trying to get all the steps…. I know, start earlier, blah blah.. 2 and 4 yr olds make everything harder. But anyway, if I don’t get to all these steps, and I get up to bake at 6… would it be so terrible to put it in the banneton at about 10 pm and leave it on the counter to proof til 6am and then bake it? Or do you think overproofing would happen then? We live in dry Colorado and my house is roughly 67 degrees all night. Any ideas??
I think the loaves would definitely over proof and over ferment with that long at room temp. Plus, you’d be skipping the step that allows the dough to develop most of the flavor – the cold proof. If you are wanting to go to bed at 10 and not wait the final hour to proof at room temp before putting into the fridge – a better option would be to just skip the room temp rise and put the loaves directly into the fridge, and bake them around noon for a 14 hr cold proof.
I followed the directions to a t. They turned out really pretty but fairly flat. I’ve never done a fridge proof before and was super skeptical and i’m super bummed that my fears were confirmed. I’ve been making sourdough sandwich bread for years without issue so I have full faith in my starter. Any idea why they didn’t rise like yours?
Hi,
I’ve made this recipe several times and I love it. I’d like to branch out and try the Herbs De Provence or a Rosemary version. Do you have a recommendation for how much to add? I find I either add too much or too little!!
Glad to hear you’re enjoying the recipe, Stephanie! I find that 2 slightly rounded Tablespoons of dried herbs is just the right amount. I add my dried herbs in along with the salt and after the autolyse.